
I was very concerned about strength and integrity of the framing on the hard tail, so I cut smaller tubing to fit inside the larger tubing any place that there might be added stress to the frame joints.

Using the self timer on my camera I took this picture, of me tacking some of the spots on the Hard Tail. (No eyes were burned in the taking of these pictures!)

Just arms! You have to love a good welding burn! As you can clearly see in the first picture I was using my protective leathers to protect the bike and not myself. It looks worse then it really is, at least I didn't burn the bike that would have been horrible.

Here I am again welding away, I was pretty exited that I might be able to finally get the bike off the jack stands and jack under the rear wheel!
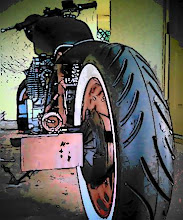
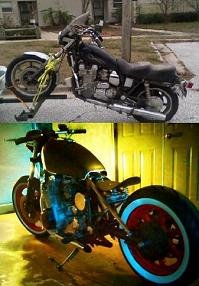
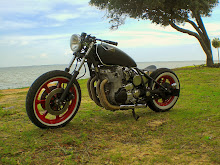
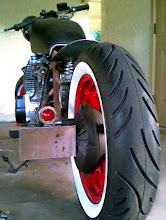
 Finally its resting by itself on the kickstand, instead of jack stands! I'm going to have to trim up the seat pan a little but that should be about where the seat is going to rest. The top of the seat sits just below knee level, very low and just where I wanted it. So for once something went as planned. Now those pipes need some black heat wrap I know its a rat rod bobber but that will help it look a little bit better. It still has a long way to go!



I am really enjoying your progress. I've been wanting to bob out an old school metric for a while now and found a source for a cheap xs1100 basketcase. So first thing I did was google for "xs1100 bobber" and here I am. Truly inspiring, whitewalls and all. There is just something gangster about an inline four spilling out of a rigid frame. I'm dying to know how it rides when completed. Unfortunately for me, I'm a bit slow to the punch and that basketcase is spoken for. Back to practicing my welding.
ReplyDeletemrgibbysworth,
ReplyDeleteThanks for the comment and the compliment! I did the exact same thing when I decided to do this project, I Google searched "XS 1100 bobber", but didn't find much, and that's what inspired me to do this page. I hope that it might make it a little easier if anybody else tackles a XS11 project. However if your XS11 project fell through there is always the option of the old XS650 Bobber. There would be a lot more stuff available including pre-made weld on hardtails. However you wouldn't have the mean added HP of the 1100 or the shaft drive. Please keep me posted on your progress.
Thanks Again,
Shop
I am in the middle of a similar project and am thinking about the fact that the stud that the frame now mounts to on the final drive will make it difficult/nearly impossible to remove the rear wheel/swingarm. I may have just stared at it too long and confused myself but I would like to know your thoughts on it.
ReplyDeletethanks...awesome build
Eric,
ReplyDeleteI wrestled with that thought myself for quite a while too when I was doing mine. This is what I came up with. For the XS1100 there is a bolt on the right side and a stud on the left. There are two ways to remove the final drive. The first is remove the tire. Then right side bolt, then left side stud (yes it is threaded and can come out,) not sure if you have a XS1100 or not but thats how it works then you remove the final drive like normal 4 bolts ect. However shoot me a email using the form to the right, and I'm sure there's a way to to do it. Thanks again for the comment to.
Shop
did you weld the hard tail in the rear or bolt it on to the shock mounts?
ReplyDeleteJeffster,
ReplyDeleteSorry about the delay. Yes you are correct I welded the hardtail to the frame and bolted it to the existing shock mounts so the swing arm and final drive could still be removed if necessary. Hope that answers your question and thanks for checking it out.
Shop
Love the bike man looks similar to what I'm looking to do just not as in depth I'm hopping I can knock mine out in about a month I just got my 1100 on a trade perfect bike for a chop looks good and I'll make sure to email you with any questions LOL
ReplyDelete