 Here's the start of my fake oil tank that I'll be using to hide all the wires that are located under the seat of the XS1100's. I looked on E-bay to see if I could find something maybe that somebody else had already fabricated an suprisingly enough I found a company that made battery boxes and also dummy oil tanks for the XS650's and it would have worked out great, but the wanted a arm and a leg for them. I wrote them a quick email hoping for a discount but they wouldn't budge, go figure. So I did what I do, I made my own. First I found a place online called Wedge Products that supplies pipe end caps. However their orders are a minimum of $75 for Steal and Aluminum and $150 for Stainless, but there is a way around that minimum order fee. I talked to a lady named Connie at this phone # 330-425-0099 ext 18 and she let me know about something called a sample pack for $30 where you are able to "sample" different sizes of end caps. I just happened to get two Stainless 5 inch inside Diameter Caps and two 4 inch steal. I ended up only using the 5 inch Stainless caps.
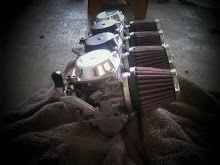
 Here's the 5 inch Stainless caps, I won't lie I expected the caps to be a polished Stainless, but they were far from that. The edges were very rough and jagged and the sides had lots of groves. I just noticed the Madagascar penguin in the background of this photo, "Smile and wave boys, smile and wave?" no doubt the sneaky handy work by my son.
 Lucky for me I'm no stranger to elbow grease, so out came the file and lots and lots of filing. I know your thinking, "why a file" the walls of the cap are really thin and I was worried that if I used a grinder that I would heat it up to much and have to get another sample pack. I did hit it a little with a Dremel.
 Ruffles aren't the only thing with Ridges, these Caps are rough!
Here it is cleaned up a little but those sides still have a long way to go!
 After a good go at it with the file the next step was 60 grit sand paper.
 After the 60 grit, then 100, then 220, then 320, then 400, then 600.
 If you stopped at 600 grit this is what it would give you, not bad.

I moved on to 1200 grit, all the way up to 2000 grit and I was going to take it to 4000 but I couldn't find any place here in town that had 4000. So that will have to happen later. After a good go at it with the file the next step was 60 grit sand paper.
 After the 60 grit, then 100, then 220, then 320, then 400, then 600.
 If you stopped at 600 grit this is what it would give you, not bad.
 The next thing I needed was a piece of 5 inch diameter pipe. That was easy too, I went to my local muffler shop and bought 11inches for $15 a little steep if you ask me but at least it went into the local economy. When I got it home the caps fit perfect as advertised.
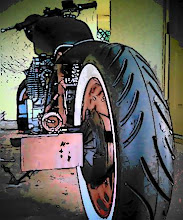
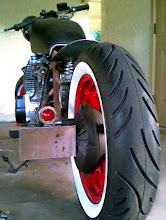
After a quick temporary install I could tell it was going to work out nice, this took place a while ago as you can tell from the seat spring not being mounted yet, but as I said in the day165 post I was waiting to get the tank a little more together so I wouldn't have a couple different posts about the tank.
 Here's another view, it still needs paint, because bare metal doesn't last long in Florida's salty and humid climate.
 Let the sanding begin!
 Slow sanding but it's getting there.
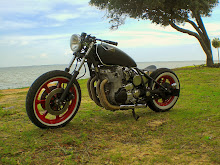
Here it is with a little fresh paint I am still going to have to drill holes in it but at least it wont get to rusty sitting around.
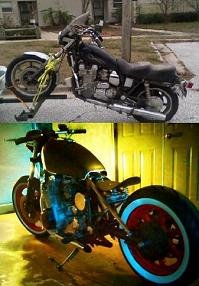
 After a long night here it is mounted in the bike with nothing other then my favorite carriage bolts.
 Another view.
 Tomorrow hopefully I can drill a couple holes, for the wires to go through and everything hopefully will be out of sight and out of mind.


Hello, this is Connie, I wanted to say thanks for the mention of my Wedge Caps and ME!! That is great, plus I feel like a celebrity now. Sorry about the roughness of the cap, but you did a great job finishing it. I have heard from several followers already, shipped some orders out too!! Glad to help with solving this problem at a decent cost for you guys.
ReplyDeleteConnie,
ReplyDeleteIt was no problem mentioning you. I don't mind giving credit where credit is due. The caps worked out great and I'm glad that it is bringing in a little business for you as well.
-Shop