 Well yesterday when I was going to take my first ride since I've owned the bike, but that was all halted by the front brakes dragging, it was so bad that I could hardly push it. So caliper cleaning... The folks at xs11.com suggested that I disassemble the calipers clean them and put them back together. So I did and here it is step by step. 1st you have to remove the the screw in the back of the caliper as you see here already loose. If you don't remove it the caliper won't budge.
 2nd, you can either remove the caliper bolt or the banjo fitting that secures the brake line to the caliper they both have to come off so pick your battle. However you choose when you remove the bolt form the banjo fitting be sure to clean it out they get really gummed up.
 Well here it is, this is actually a spare that I have for the rear but it's the exact same concept.
 This is where all the dirty work happens.
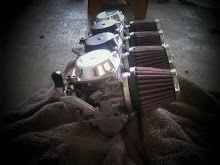
 Here are some of the tools, Not the best stuff to use, but this is how I did it, I took a old tire tube and cut off the valve stem to be used with a compressor to blow out the caliper piston. My compressor was this little guy that costs about $9 at Wal-Mart. However it is much better with a real compressor. The scribe comes in handy when you have to remove the rubber ring inside the caliper cylinder. Also a piece of wire for cleaning the banjo fitting bolt. But we are getting ahead of the steps.
 Before any of that happens this little metal clip needs to be removed along with rubber dust seal.
 Here they are removed.
 Now it's time to blow out the piston with the compressed air.
 Ideally place a bucket to catch any residual fluid and the piston if it shoots out.
 60psi normally is all it takes.
 This is the piston as it started its way out.
 After the piston is out I took 2000 grit sandpaper and cleaned it up.
 I also cleaned up the clyinder walls. Be sure to remove the rubber seal and clean the groove that it rests in. "Goo" gets in the grove and makes that rubber seal fit tighter on the piston.
 The seal also needs to be cleaned, I found the best way is using my thumbnail as shown above to scrape off the grime, and crusty parts.
 Here it is all cleaned up and ready for re-assembly.
 So install the rubber ring back into the cylinder, and then use some clean brake fluid to lubricate the seal and the piston and slide the piston back into the cylinder.
 Then I cleaned the dust seal and installed it back on and secured it with the metal ring.
 It's all done and ready to go back on the bike, remember to put that set screw in and make sure it goes through the hole in the top of the pad, you can check this with the little door in the top of the caliper.
 Finally secure the caliper with the mounting bolt and then put the brake line back on. Be sure that you have the brass washers on each side of the banjo fitting. The brakes will have to be bled out to remove any air that got into the line while you where fixing your calipers. After I finished the bike rolled almost as easy as my moped. However that's with all new bearings as well. After fixing that I tackled the Carb issue that I thought was the float needle bypassing fuel, which it was because one of the floats was cracked and no longer floating to shut off the fuel flow to the carburetor.
Here's a few videos of the long time waiting "Maiden Voyage." The noise in the background before I start the Bobber is another bike. Luckily Scott was here to follow me as my taillight. Oh and because I'm in the military I'm required to wear the lame reflective vest when I ride a motorcycle.


No comments:
Post a Comment