Today was some serious business,
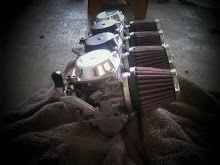
(all of these pictures are a lot bigger if you click on them). I took advantage of a Comp day from work and with my time off I did some more fabricating. This is what I started with (above), first I decided to make a cross bar in front of the tire (shown below) for the battery box to mount against and to double as the spring mounts for my seat.

So this is where I began I cut a piece of 1 inch tubing just a bit longer than what I needed so I could grind it out to fit flush between the two horizontal supports, that way I shouldn't have to fill a huge gap when welding. It worked out just like I planned, that's odd, I almost get concerned when things start going smooth.

Here it is after the grinding, it fits really well and the battery box is going to mount up without any problems.

Here I am, doing what I do, welding away. I'm tacking the cross tube into place as you can tell by the vise grips on this side.

Well here it is and welded up, next step is the tank mount.

Here's the non-finished tank mount, the first thing with the tank mount was to decide how much to cut off to make it easiest to weld the new pieces on. So I trimmed it back and need to figure out my angles and length of the pieces going in. So If I take the hypotenuse, squared subtracting the tangent of the opposite over the adjacent carrying the 5 and dividing by seven with a pinch of the old eye ball treatment I think it will work out nice.

Here it is! It took quite a while to get the two pieces that I cut ground down to the right size, maybe I should have carried the seven and divided by five? Once I finally got them ground down to the correct length I tacked them on and it was smooth sailing. If you are wondering, I didn't weld them in with the gas tank installed, however that might have made it a little more exiting?

Here's another shot of the gas tank mount all welded and ready to go.

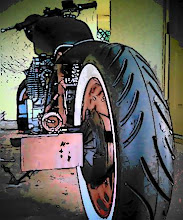
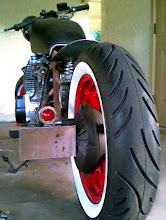
If you didn't notice in the earlier pictures the brakes where just dangling by the front tire today I also put those on and gave them a good bleeding. I took this shot right before I cleaned up for the day I know that it probably doesn't look like much but there was a lot more to it then what the pictures show.

Here's the other view, I've got to get the seat mounted and those wires hidden and I'll be able to take her around the block to see how she goes! If you notice the big pipe in the back ground that's part of whats to come, I'll be fabricating a dummy oil tank to keep all those wires hidden out of sight and out of mind. That should make a huge difference! You can also see my reciprocating saw/eyeball calculator resting in the background, if you didn't read the previous captions that won't make any sense and maybe not even if you did?
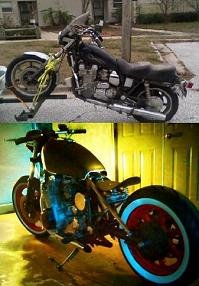
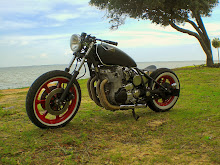
 With a new look and big plans!
 With a new look and big plans!